
  |
The left image shows the screen after bringing an image into A+ Signature; use the gear (next to Help on the lower left) to get to the Preferences screen. The first time you use A+ Signature, the default settings for Preferences have a GIANT SIGNATURE that is white text with a shadow in a text I personally would never use. If you set things up for your signature in a font, style, and color that you like, then you will have that setup as your starting point for all future signatures. I had already set a signature in gray with Zapfino text and no shadow.
  |
The text is difficult to see in the center of the image on the left. (when you click "Text" in the red bar below the image, the default signature text gets added in the middle of the image) Select this text to reveal an "X" in the upper left corner of the text bounding box and a tiny circle symbol surrounded by three directional arrows in the right, middle of the bounding box. The X allows one to delete text boxes entirely; grabbing on the circle surrounded by three arrows and dragging in a direction (up or down) will rotate the text.
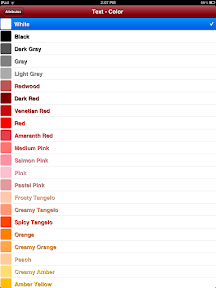  |
Double-click the text box to allow editing; change the text color to white as shown in the color Attributes page and in the image on the right; the image on the right shows the text location and size after using two fingers to shrink or expand text size as required.

This image, signed in A+ Signature is part of another tutorial. You may either return to that tutorial OR return to the blog.
NOTE: If you found your way here from one of my other tutorials, just use the back button to return to the previous page.
No comments:
Post a Comment
I appreciate your comments and hope to return your visits soon. If you have any questions about apps used in tutorials, drop a comment with your question and I will either respond here (if the answer is brief) or address it in a future post if I have an answer for you. :-)