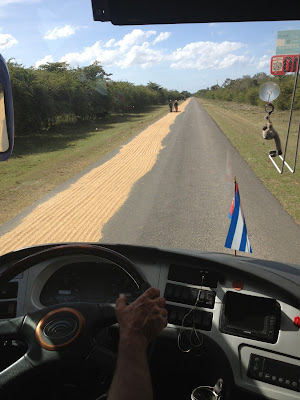
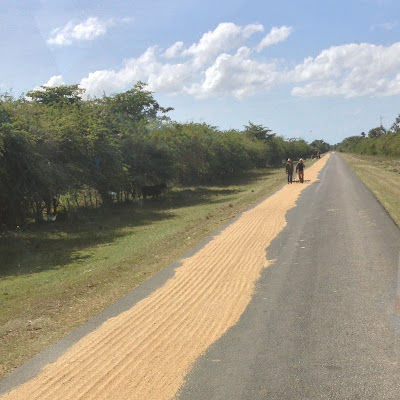
The first image below is the result of processing the second image below through several steps which will be covered in detail in this tutorial. The original image was shot through the bus window with the iPhone 4s native camera app. Apps used for post processing on the iPad include PerfectPhoto, Touch Retouch, Painteresque, Image Blender, Photo fx Ultra, and A+ Signature.

Finished image of rice drying on the road in Cuba.

Original native iPhone 4s image shot through a bus window.
The first steps were done in PerfectPhoto (tutorial available) and included cropping, sharpening and denoise steps resulting in the image below.

I chose a square crop to eliminate as many of the distracting elements as possible. You will have noticed that the crop I chose didn't eliminate all of the visor at the front of the bus (still visible along the top of the cropped image) and left some other artifacts and distracting elements due to having been shot through the bus window. I next used Touch Retouch to remove those elements I found distracting. Between the brush and the lasso tool, the entire process took me less than five minutes. If you are new to using this marvelous iPhone app, I recommend viewing the in-app tutorials as many times as necessary to get the hang it it. For those familiar with Photoshop content aware tools, Retouch is the iPhone answer to that function and does a fantastic job of retouching images!
When using Touch Retouch, two finger pinch or spread action will allow you to zoom out or zoom in to facilitate retouching. Sometimes, the entire image won't be visible at first in which case you will want to pinch the image to shrink it to fit in the screen so you can see the edges and work on them. A screen shot below shows the visor marked in red (it was selected using the lasso tool to select a bit of the blue sky all around the edge of the visor). When the right "arrow" (showing as a triangle to the right of the hand icon along the bottom edge of the screen shot below) is clicked after selecting an area for retouching, the retouch tool will magically get rid of the visor and replace it with blue sky.

First step in retouching
Additional artifacts were removed with either the brush or the lasso, resulting in the retouched image shown below.

Painteresque is just what it sounds like, a painting app that will apply a style of painterly treatment to an image. I had a specific "look" in mind for my finished image and knew that Painteresque would be a good choice. The screen shot below shows the image after Style Painteresque 2 was applied. As you can see, by selecting Style in Painteresque, you get a menu of style options. Experiment to see what is available. It is even possible to Fine Tune any of the styles but I accepted the default settings for the style. It is a bit "over the top" for the effect I wanted, but I knew that blending it with the retouched image in Image Blender would tone done the effect. So I saved it to the camera roll for continued processing.

The next screen shot shows the result of loading the retouched image into Blender (tutorial available) on the left side and the Painteresque processed image on the right side and blending using Normal blend with 60% of the Painteresque image in the blend.

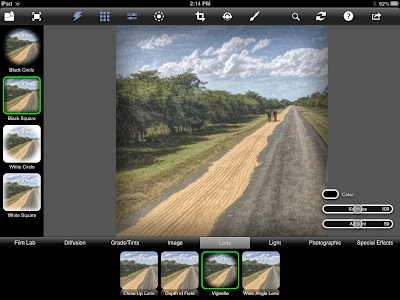
The last step before signing with A+ Signature (tutorial available) was to take the blended image into Photo fx Ultra and apply a vignette using Lens/Vignette/Black Square at 50% amount and 100% softness as shown in the screen shot below. (The default amount is 100% amount which I find to be overpowering.)

One step not illustrated is the second iteration of using Touch Retouch to get rid of a strange looking spot in the sky that was exaggerated once the Painteresque style had been applied. The finished image is shown again below because I'm too lazy to code the link needed to go back to the top of the page.

Finished image of rice drying on the road in Cuba.

Victoria, great job on the tutorial! Dont know how to keep motivated on writing blog stuff. I am in the process of setting up my own, maybe in time we can share how we keep motivated. Thinking..... for me it might mean that I get some comments or see that someone is looking at the blog. just a thought. Irene
ReplyDelete
ReplyDeleteThanks so much!! Your site looks nice. Wikidot sounds perfect!
Image Processing