Captured on an iPhone 4 using ClassicPAN; post processed with Painteresque, Blender, Iris on an iPad 2.

Monday, June 11, 2012

Hydrangea post processing with Painteresque, Moku Hanga and Blender...

This tutorial demonstrates use of Moku Hanga and Painteresque to create a couple of layers (images) that are then blended using Blender to achieve a final result that I found pleasing. It is a very simple tutorial. As always, the steps will be summarized first and then a series of images showing the process will be included below the outline.

  1. The starting point for this tutorial is a cropped and sharpened image (see the PerfectPhoto app guide for steps) obtained from merging HDR images (TrueHDR) shot with the iPhone 4 native camera.
  2. The image was loaded into Painteresque for one "layer" to be used later (Image 1).
  3. The Portrait preset in Moku Hanga was applied to the cropped, sharpened image and the image saved (Image 2).
  4. Image 1 and Image 2 were brought into Blender and blended with Luminosity at 50% and the image was saved.
  5. The saved, blended image was signed with A+ Signature.
  6. Two other images were created for possible future blends, one from AutoPainter Benson effect and one from using "My flower preset" in Moku Hanga. (My flower preset is based on Landscape 2 with the border removed and makes a very nice flower painting.)

cropped and sharpened image
This tutorial starts where the app guide for PerfectPhoto left off, with the cropped and sharpened Hydrangea image.

Painteresque effect
Painteresque effect applied to the cropped, sharpened image.

Moku Hanga screen shot
Several preset effects are available in Moku Hanga. It is worth your time to play around with the presets and discover what works best for your image and the effect you are trying to achieve. For example, the preset I chose for my Hydrangea image is labeled "Portrait" and I just happened to like the effect achieved here. At some point, I might write a mini-tutorial on Moku Hanga but it is pretty straightforward to use. Any image loaded into it will have an effect applied automatically but I never know WHICH effect is applied. Since I like to know what effect is being applied, I always experiment a bit. If you find an effect you like, you can save it out as a Preset with a name that makes sense to you. Use the Share button and select Save Preset instead of Save; presets are organized alphabetically in Moku Hanga so yours will appear according to that organization the next time you open Moku Hanga.

Portrait effect image from Moku Hanga
Saved image after application of the Portrait effect in Moku Hanga.
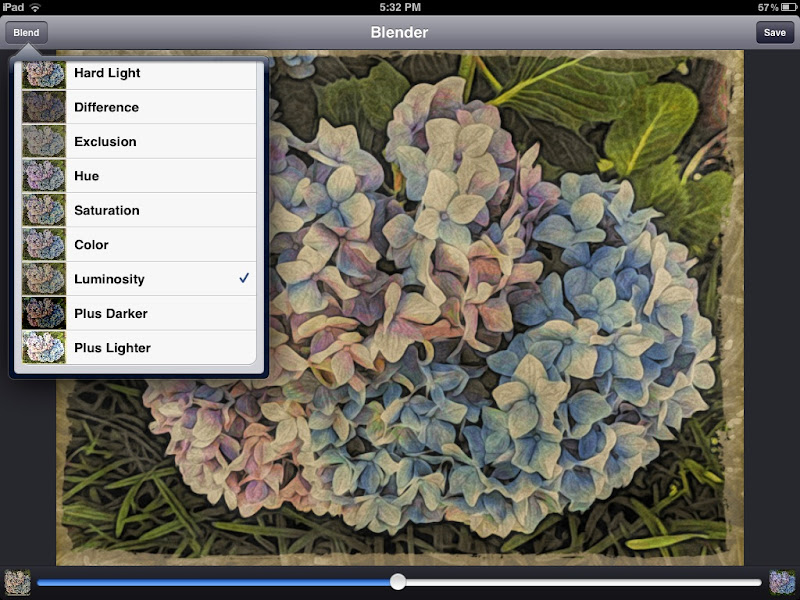
screen shot of Blender process
Screen shot of Blender showing 50% Luminosity blend of the Moku Hanga Portrait image with the Painteresque image.

signed image
Signed image (signed with A+ Signature; usage covered elsewhere after blending as described above.)

These last three images are included to show a screen shot after using "My flower preset" in Moku Hanga, the saved image after applying that preset, and last, AutoPainter 3 Monet effect applied to the cropped, sharpened image. I often save multiple versions of an image for later experimentation, even after I've found one combination I like well enough to sign it.
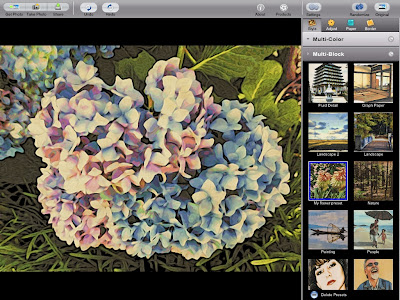
my flower preset in Moku Hanga
The preset I've saved in Moku Hanga as "My flower preset" is based on the supplied Landscape 2 preset with the border removed.

Moku Hanga saved with my flower preset effect applied
Image saved from Moku Hanga after applying "My flower preset."

AutoPainter 3 Monet effect applied to image
AutoPainter 3 Monet effect.

Saturday, June 2, 2012

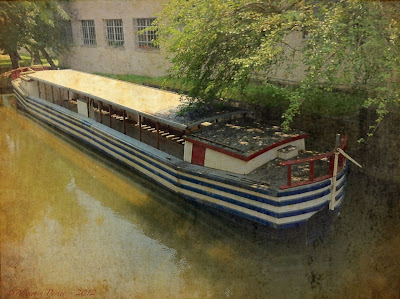
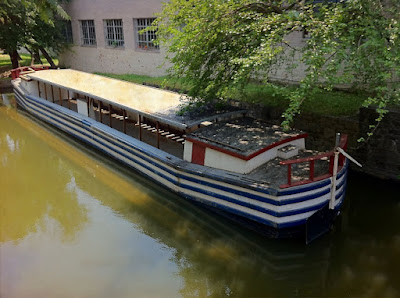
C&O Canal Boat, idle in Georgetown, DC

While wandering around Georgetown last Saturday before having lunch with a friend, I spotted this canal boat parked near 31st St NW. The light caught my eye even though I was quite certain the sunlight would "blow out" the white roof completely. I could see editing the image to take care of that and just maybe end up with something quite nice.

My iPhone tutorial posts will follow a general format of showing the starting and ending image at the start of the post, followed by the "expert" recipe. After the "expert" recipe, I'll show the step by step process. Please realize that these tutorials are really not intended to be a "go out and repeat this exactly" recipe but rather a tutorial to show one (sometimes two) possible processing paths for an image. Those of you unfamiliar with iPhone processing of images may not realize yet the HUGE number of apps available for post processing (both iPhone and iPad). My hope is that these tutorials will start you on a path of exploration to discover for yourselves the many possibilities there are for tuning your images into something that you envision when out exploring the world.

TrueHDR merged image
signed image after processing as described
signed image after further processing as described
The top image (obtained by merging two exposures (shot with the native iP4 camera in HDR mode) using TrueHDR) is the starting point; the middle image is the image obtained from processing as outlined below through Step 6; the bottom image is the result of applying an effect to the Image from Step 2 in the outline below and blending that with the image processed through Step 5. (Note that the above images may be viewed larger size by clicking on any one of them.)

  1. The two HDR exposures were merged with TrueHDR.
  2. PerfectPhoto was used to sharpen, and de-noise the image (Image A in future steps).
  3. The Ancient Canvas effect was applied using PhotoStudio HD and the image saved (Image B in future steps).
  4. Blender was used to blend images A and B at 70% Normal Blend.
  5. Pic Grunger was used to apply the "Scuffed" Effect at ~40% (Image C in future steps).
  6. Image C was signed using A+ Signature.
  7. One could stop at this point but I chose to try one other blend.
  8. A Moku Hanga effect (will figure out which one at some point, experiment) was applied using a Preset that I saved some time ago and cannot recall exactly how I got it (danger of late night playing); result saved (Image D).
  9. Images C and D were blended using the Luminosity Effect in Blender.
  10. The result of the blend above was signed using A+ Signature.

TrueHDR merged imagesharpened and de-noised image
I'm showing this because it amazed me to see the difference in the image after sharpening it and also using the Denoise option in PerfectPhoto; left image before sharpen and denoise were applied, right image after sharpen and denoise.


>
screen shot of Ancient Canvas effectAncient Canvas effect saved image
Screen Shot of application of Ancient Canvas applied to image; saved image after application of Ancient Canvas.

blended image as described
scuffed effect Pic Grunger image
The top image is the result of blending Image A and Image B using Normal Blend at 70%; masking was used to bring the Ancient Canvas effect onto the blown out white roof and leave the rest of the image relatively untouched; the bottom image is after application of the Scuffed effect (at 40%) to the blended image using Pic Grunger (Image C). (The signed Image C is not shown before continuing with additional post processing steps since it is the middle image in th set of three images at the top of the page.)

screen shot from Moku Hanga
image saved after application of Moku Hanga effect
The top image is a screen shot of the application of a saved preset in Moku Hanga; the second image is the saved image (Image D) after application of that effect.

screen shot of luminosity blend of images
image after applying luminosity blend
The top image is a screen shot of application of the Luminosity blend at 40% to Images C & D in Blender; the bottom image is the saved, blended image. (Again, the signed image is not included here because it is the third of the three images at the top of the page.)